Unlock Effortless End-to-End Testing with KaneAI
This tutorial will guide you through the process of leveraging KaneAI, a powerful tool that utilizes artificial intelligence to simplify end-to-end (E2E) testing. You’ll learn how to translate your testing intentions into executable test cases using natural language commands, and understand how KaneAI generates and executes these tests across different environments.
What You’ll Learn
- How to use natural language to define E2E test steps.
- How KaneAI interprets and plans your test scenarios.
- How to execute tests in simulated browser environments.
- How to review and save generated test cases.
- How to access and utilize the generated test code.
Prerequisites
- Access to KaneAI (provided by TestMu).
- A web application or website you wish to test.
Step-by-Step Guide to Creating E2E Tests with KaneAI
Step 1: Define Your Test Scenario Using Natural Language
The core of KaneAI’s functionality lies in its ability to understand natural language. Open the text input area within KaneAI and articulate your test scenario as a series of commands. For instance, you can instruct KaneAI to navigate to a specific webpage, interact with elements on that page (like entering text into a field), and then perform an action such as clicking a button. The key is to be descriptive and sequential.
Example: “Go to the freeCodeCamp challenge. In the text box, enter this. This is going to solve the challenge. Click check your code. And then if the submit and continue button shows up, then we’re done with the test.”
Step 2: Initiate Test Plan Creation
Once you have entered your natural language instructions, initiate the test creation process. KaneAI will then begin to interpret your commands and formulate a test plan. This involves breaking down your instructions into discrete, actionable steps that the AI can execute.
Step 3: Review and Approve the Test Plan
After KaneAI generates the initial test plan, you will have the opportunity to review it. This step is crucial for ensuring that the AI has correctly understood your intentions. You can make any necessary modifications to the plan before proceeding. Once satisfied, approve the test plan to move forward.
Step 4: Execute the Test in a Simulated Environment
With the test plan approved, KaneAI will begin executing the test. You can choose the environment in which the test runs, such as a desktop browser, a mobile app, or a mobile browser simulation. KaneAI will then launch the specified environment and perform the defined actions step-by-step.
As the test progresses, KaneAI provides real-time feedback, showing you exactly what actions are being performed and what assertions are being made. This includes verifying that pages load correctly, that input fields accept data, and that specific buttons appear as expected.
Step 5: Monitor Test Execution and Assertions
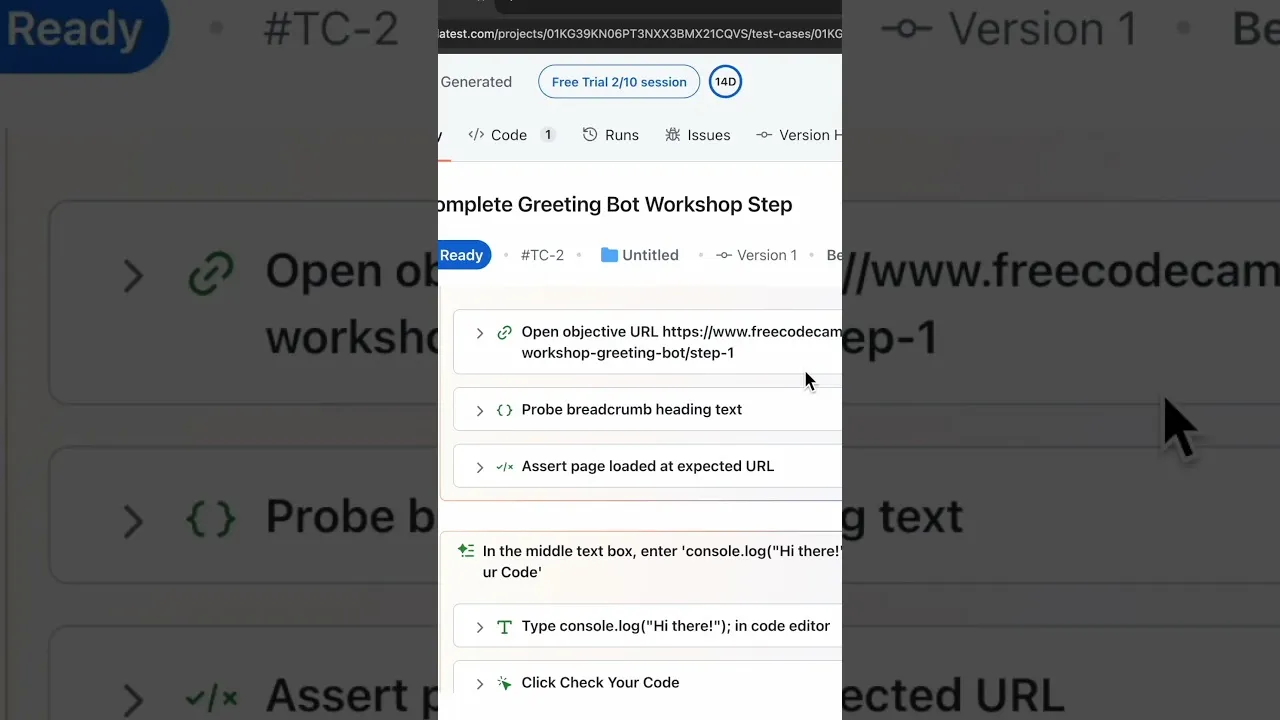
During execution, pay close attention to the feedback provided by KaneAI. You will see a log of actions, such as navigating to a URL, entering text into an input field, and clicking buttons. Crucially, you’ll also see the assertions being made. These are checks to ensure that the application behaves as expected at each stage. For example, KaneAI will assert that the page has loaded or that a specific element (like a “submit and continue” button) has appeared after a certain action.
Step 6: Save and Review the Completed Test Case
Upon successful completion of the test, KaneAI allows you to save the generated test case. This includes a description of what the test does and a detailed breakdown of all the steps and assertions. Saving the test case ensures that you have a record of your E2E test and can easily access it later.
Step 7: Utilize Generated Test Code for Quick Execution
A significant benefit of KaneAI is its ability to generate executable code from your natural language test definition. After saving your test case, you can navigate to the code view. Here, you will find the code that represents your test. This generated code can be utilized for rapid test execution, allowing you to run the same test scenario multiple times, perhaps after making updates to your application, to ensure everything still functions correctly.
This process demonstrates the powerful transition from a human’s intent, expressed in natural language, directly to functional test code, enabling efficient and repeatable testing.
Step 8: Re-run Tests to Ensure Application Stability
With your E2E tests saved and their code generated, you can now incorporate them into your regular testing workflow. Anytime you make updates or changes to your application, you can simply run all your saved tests. This ensures that new changes have not introduced regressions or broken existing functionality, maintaining the overall stability and reliability of your application.
By following these steps, you can effectively use KaneAI to create robust E2E tests with minimal effort, significantly streamlining your software development and quality assurance processes.
Source: Easily Create E2E Tests with KaneAI (YouTube)