What is Transformers.js?
Transformers.js is a groundbreaking JavaScript library that allows you to run sophisticated machine learning models directly in the web browser. Unlike traditional approaches that require sending data to a server for processing, Transformers.js enables client-side inference, meaning your data stays on the user’s device. This opens up a world of possibilities for creating interactive and intelligent web applications without the need for cloud infrastructure, API keys, or payment gateways. This article will guide you through the process of loading and using Transformers.js within a p5.js sketch, demystifying its core concepts and demonstrating its potential.
Overview of What You’ll Learn
In this tutorial, you will learn:
- The origins and purpose of Transformers.js.
- How to set up your p5.js environment to work with the library.
- The role of the
pipelineAPI for easy model integration. - How to handle JavaScript’s asynchronous operations (
async/await) and ES6 modules (import) in p5.js. - To create a sentiment analysis pipeline and process text.
- How to specify models, devices (CPU/GPU), and data types (precision) for your pipelines.
- To explore different tasks and models available through Hugging Face.
- To build a basic interactive example using Transformers.js with p5.js DOM elements.
Prerequisites
- Basic understanding of JavaScript programming.
- Familiarity with the p5.js library (version 2.0 or later recommended).
- Access to a web browser.
Step 1: Setting Up Your p5.js Environment
To begin, ensure you are using p5.js version 2.0 or later. If you are using the p5.js web editor, you can update this by clicking the chip icon in the top right corner and selecting a version 2.x release. This version introduces support for modern JavaScript features like ES6 modules and asynchronous operations, which are crucial for Transformers.js.
Step 2: Understanding JavaScript Modules and Asynchronous Operations
Transformers.js utilizes modern JavaScript features that might be new if you’re primarily accustomed to older p5.js patterns. The most significant are:
- ES6 Modules (
import): This syntax allows you to import specific functions or objects from a library. For example,import { pipeline } from '@xenova/transformers';. In p5.js, especially when not using a build system, directly usingimportcan be challenging. We’ll address this by using a different approach to load the library. asyncandawait: These keywords are used to handle asynchronous operations, such as loading models or fetching data, in a more readable way. Anasyncfunction is required to use theawaitkeyword within it.
Step 3: Loading the Transformers.js Library
Instead of a direct import statement, we will load the library using a script tag in your index.html file (or the equivalent in the p5.js web editor) and then use a JavaScript function to load it dynamically. This approach works well with p5.js’s global mode.
In your sketch’s JavaScript file, you’ll typically use code like this:
- Declare global variables: Since we’ll be using the loaded library and its pipeline in different functions, declare variables to hold them globally.
let pipeline; let txtInput; let resultP; - Use a dynamic import function: Within your
setup()function (which should be marked asasync), you’ll use a function to load the library. This function essentially simulates theimportbehavior.async function setup() { // ... other setup code ... // Load the Transformers.js library pipeline = await loadTransformers(); // ... rest of your setup ... } - The
loadTransformersfunction: This helper function will handle fetching the library from a CDN.async function loadTransformers() { // Dynamically import the pipeline function from the Transformers.js library // Note: The '@xenova/transformers' path is a placeholder for how it's typically imported. // In a script tag setup, we often use a direct URL to the library. // For this example, we'll assume a function that resolves the library. // A more direct approach using a script tag in HTML and a global variable: // Ensure you have a script tag like this in your index.html: // // Then, in your JS, you might access it via a global variable or a specific loading function provided by the library. // For demonstration purposes, let's simulate loading: // In a real p5.js sketch, you would typically ensure the script tag is present // and then access the library, possibly through a globally available object. // The core idea is to get the 'pipeline' function. // If using the script tag approach, the 'pipeline' function might be globally available // or you might need to access it like: window.transformers.pipeline // Let's assume for this example that 'pipeline' function becomes available globally // after the script tag is loaded. // A simplified way to ensure it's ready: while (typeof transformers === 'undefined') { await new Promise(resolve => setTimeout(resolve, 100)); // Wait for the script to load } return transformers.pipeline; // Assuming 'transformers' is the global object }
Expert Note: The exact method of loading can vary. Using a CDN link in your HTML’s index.html file is the most common way for p5.js sketches that don’t use a build system. Ensure the CDN URL points to the correct version of the Transformers.js library.
Step 4: Creating a Sentiment Analysis Pipeline
The core of Transformers.js is the pipeline API. It simplifies the process of using pre-trained models for various tasks. To create a pipeline, you need to specify the task.
- Specify the task: We’ll start with sentiment analysis.
const task = 'sentiment-analysis'; - Create the pipeline: Use the loaded
pipelinefunction, passing the task. This operation is asynchronous, so useawait.// Assuming 'pipeline' is the globally available function from Transformers.js // and setup() is marked as async pipeline = await transformers.pipeline(task); // For better variable naming, let's name it according to its function: analyzer = await transformers.pipeline(task); - Object Destructuring: The statement
import { pipeline } from '@xenova/transformers';uses object destructuring. If the library exports multiple items, this syntax allows you to pull out only the ones you need (likepipeline). When loading via a script tag, you might get a global object (e.g.,transformers) from which you access the desired functions.Example of object destructuring:
const inventory = { mango: 5, blueberry: 100 };
// Instead of:
// let mangoCount = inventory.mango;
// You can do:
let { mango } = inventory;
console.log(mango); // Output: 5
Warning: When creating a pipeline, Transformers.js will automatically select a default model for the specified task if you don’t provide one. While convenient, it’s good practice to specify the model explicitly for reproducibility and clarity.
Step 5: Running the Sentiment Analysis
Once you have a pipeline, you can pass data to it for processing.
- Define input text: Prepare the text you want to analyze.
const textToAnalyze = "Transformers.js is amazing!"; - Process the text: Call the pipeline function with your text.
// Assuming 'analyzer' is your sentiment analysis pipeline const results = await analyzer(textToAnalyze); console.log(results); - Interpreting results: The output is typically an array of objects, where each object contains a
label(e.g., ‘POSITIVE’, ‘NEGATIVE’) and ascore(confidence level).Example output:
// [ { label: 'POSITIVE', score: 0.99987 } ]
Important: The pipeline always returns an array, even if you pass only a single input. You’ll need to access the first element (index 0) of the results array to get the analysis for your single input.
Step 6: Making it Interactive with p5.js DOM Elements
Let’s integrate this into a simple interactive sketch using p5.js DOM elements.
- Create DOM elements: In your
setup()function, create an input field and a button.// Inside async function setup() { // ... createCanvas(400, 200); txtInput = createInput('This is a test sentence.'); txtInput.position(20, 50); let button = createButton('Analyze Sentiment'); button.position(txtInput.x + txtInput.width, 50); button.mousePressed(analyzeSentiment); resultP = createP(''); resultP.position(20, 80); // ... } - Create the analysis function: This function will be called when the button is pressed.
async function analyzeSentiment() { const text = txtInput.value(); // Ensure pipeline is loaded before analyzing if (pipeline) { const results = await pipeline(text); // Destructure the result for easier access let { label, score } = results[0]; resultP.html(`Sentiment: ${label} (Score: ${score.toFixed(2)})`); } else { resultP.html('Model not loaded yet. Please wait.'); } } - Handle asynchronous calls in event handlers: Notice that
analyzeSentimentis also anasyncfunction because it usesawaitto call the pipeline. - Display results: Update a p5.js paragraph element with the sentiment analysis results.
Use object destructuring to extract the label and score:
let { label, score } = results[0];
Step 7: Specifying Models, Devices, and Data Types
While default models work, you can gain more control by specifying parameters when creating the pipeline.
Choosing a Model
You can find compatible models on Hugging Face. Search for models tagged with ‘Transformers.js’.
- Find a model: Go to Hugging Face and filter models by the ‘Transformers.js’ library. For example, you might find a language detection model.
- Specify the model name: Pass the model name as the second argument to the
pipelinefunction.const modelName = 'Xenova/distilbert-base-uncased-finetuned-sst-2-english'; // Example sentiment model analyzer = await transformers.pipeline(task, modelName);
Choosing the Device
You can specify whether the computation should run on the CPU or GPU (WebGPU).
- Specify the device: Add a
deviceoption to the pipeline creation.const options = { device: 'webgpu' // or 'cpu' }; analyzer = await transformers.pipeline(task, modelName, options);
Expert Tip: WebGPU can offer significant performance improvements for compatible hardware and models. If it’s not available or suitable, the library will fall back to the CPU.
Choosing the Data Type (Precision)
Models use numerical weights. You can control the precision (e.g., 32-bit float, 16-bit float, 8-bit integer) to balance performance and accuracy.
- Specify the data type: Add a
dtypeoption.const options = { device: 'webgpu', dtype: 'q4_0' // Example: 4-bit quantization }; analyzer = await transformers.pipeline(task, modelName, options);
Explanation: Quantization (like q4_0) reduces the memory footprint and can speed up inference by using lower-precision numbers. Not all data types are supported by all models.
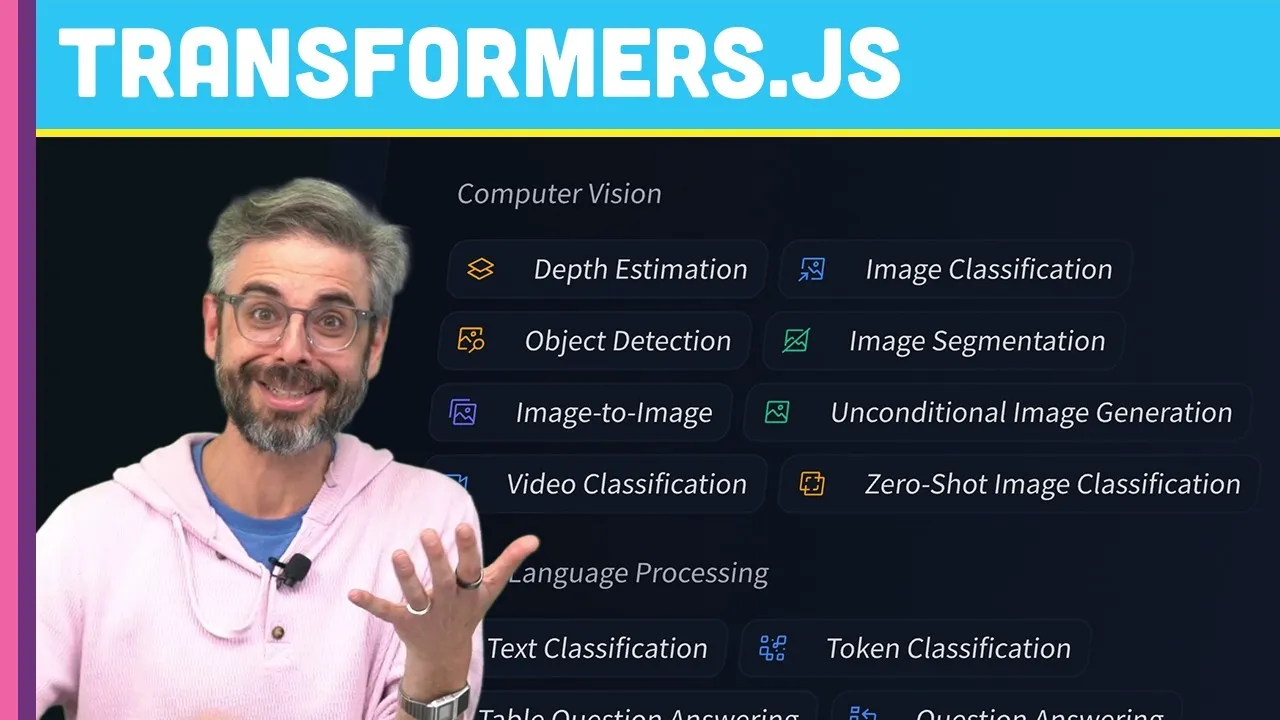
Step 8: Exploring Different Tasks and Models
Transformers.js supports a wide array of tasks beyond sentiment analysis, including:
- Text Classification
- Zero-Shot Classification
- Translation
- Summarization
- Question Answering
- Text Generation
- Image Classification
- Object Detection
- Speech Recognition (e.g., Whisper)
To use a different task or model, simply change the task string and the modelName when creating the pipeline. Refer to the Hugging Face model hub and the Transformers.js documentation for available options.
Conclusion
Transformers.js empowers you to integrate powerful AI capabilities directly into your p5.js projects running in the browser. By understanding how to load the library, create pipelines, and configure models, devices, and data types, you can unlock a new level of interactivity and intelligence in your creative coding endeavors. The possibilities are vast, from real-time text analysis to image recognition and beyond, all without relying on external servers.
Source: What is Transformers.js? (YouTube)