Master the Art of Composite Solar Eclipse Photography on a Single Film Frame
During the 2024 total solar eclipse, a unique photographic challenge emerged: capturing the entire event, from partial phases to totality, on a single piece of film. This tutorial will guide you through the process, inspired by the innovative techniques used to achieve this difficult yet rewarding photographic feat. You’ll learn how to plan, execute, and develop a composite image that tells the story of the eclipse from start to finish, all within the constraints of traditional film photography.
Understanding the Challenge
Traditional photography often involves taking multiple shots and stitching them together digitally. However, the goal here is to achieve a similar composite effect directly on a single frame of film. This requires precise timing, specialized equipment, and a deep understanding of film’s unforgiving nature.
Unlike digital sensors, film offers no room for error once exposed. This project combines technical skill with artistic vision, pushing the boundaries of what’s possible with analog photography.
Prerequisites
- A Camera Capable of Multiple Exposures on the Same Frame: This is crucial. Standard cameras automatically advance the film after each shot. You need a camera that allows you to take multiple photos without advancing the film. A medium format camera like the Mamiya RZ67 Pro with a multi-exposure capability is ideal.
- Solar Filters: Essential for safely photographing the sun during its partial phases.
- Tripod and Sturdy Mount: To keep the camera perfectly still throughout the entire sequence.
- Solar Eclipse Timer or App: To accurately predict and time each exposure based on the eclipse’s progression.
- Color Positive Film (Ektachrome or similar): This type of film is recommended for its ability to capture vibrant colors and is suitable for this technique.
- Knowledge of Film Development: Understanding the development process for your chosen film type is necessary.
- Patience and Precision: This is a high-risk, high-reward project that demands meticulous attention to detail.
Step-by-Step Guide to Composite Solar Eclipse Photography
Step 1: Choose Your Camera and Film
The core of this technique lies in your camera’s ability to make multiple exposures on a single frame without advancing the film. Research cameras known for this feature.
Medium format cameras are often preferred for their larger film area, which allows for more detail and better composition of multiple images. Load your chosen color positive film, ensuring it’s fresh and handled properly to avoid light leaks.
Step 2: Plan Your Exposure Sequence
A total solar eclipse progresses through several distinct phases: first contact (when the moon begins to cover the sun), partial phases, totality (when the sun is completely obscured), and the diamond ring effect as the sun reappears. You’ll need to plan approximately six exposures during the partial phases before totality and six more after.
The key is to space these exposures correctly using a solar eclipse timer or app that calculates the precise moments for each shot. Dr. Telepun’s expertise was instrumental in calculating these timings, ensuring the exposures would be evenly distributed across the film frame.
Step 3: Set Up Your Equipment
Mount your camera securely on a tripod. Ensure the camera is locked down and will not move throughout the entire eclipse sequence. This is critical because you will be taking multiple shots without repositioning the camera.
Attach the appropriate solar filter to your lens before the eclipse begins. If using a solar tracker, set it up according to its instructions.
Step 4: Execute the Partial Phase Exposures
As the eclipse begins, use your timer or app to guide you. At the predetermined moments, carefully operate the camera to take an exposure without advancing the film. Remember, each time you take a photo, the film advances to the next frame on a standard camera.
You need a camera that allows you to disable this advance mechanism or has a specific multi-exposure mode. Dr. Telepun emphasized the importance of precise timing, noting that random shots, as he had done previously, would not yield the desired composite effect.
Expert Tip: Practice operating your camera in multi-exposure mode beforehand. Familiarize yourself with the process so you can execute it smoothly and confidently during the eclipse.
Step 5: Capture Totality
During totality, the sun is completely obscured, and it is safe to remove the solar filter. This is the most dramatic part of the eclipse and requires its own exposure. The duration of totality can vary, so time your exposure carefully.
The goal is to capture the sun’s corona. Be aware that totality is fleeting, so be ready to act quickly.
Warning: Never look directly at the sun without proper solar protection. Only remove your solar filter during the brief period of totality when the moon completely covers the sun.
Step 6: Execute Post-Totality Exposures
As the sun begins to reappear, re-attach your solar filter and continue taking exposures at the calculated intervals, mirroring the sequence you followed before totality. This ensures that the entire progression of the eclipse is recorded on your single frame of film.
Step 7: Develop Your Film
Once the eclipse is over and you have completed your sequence of exposures, carefully remove the film from your camera. Take it to a professional film lab or develop it yourself, following the specific instructions for your type of color positive film. This is the moment of truth, where you’ll discover if your meticulously planned sequence has resulted in a successful composite image.
Expert Note: The development process for color positive film can be sensitive. Using a reputable lab like Indie Film Lab, as featured in the original video, can ensure the best possible results.
Step 8: Analyze Your Composite Image
Upon receiving your developed film or prints, carefully examine the single frame. You should see a progression of images, from the initial partial phase of the sun, through totality captured by the corona, and back to the reappearing sun. The success of the composite lies in the spacing and quality of these individual exposures, all laid out on one piece of film.
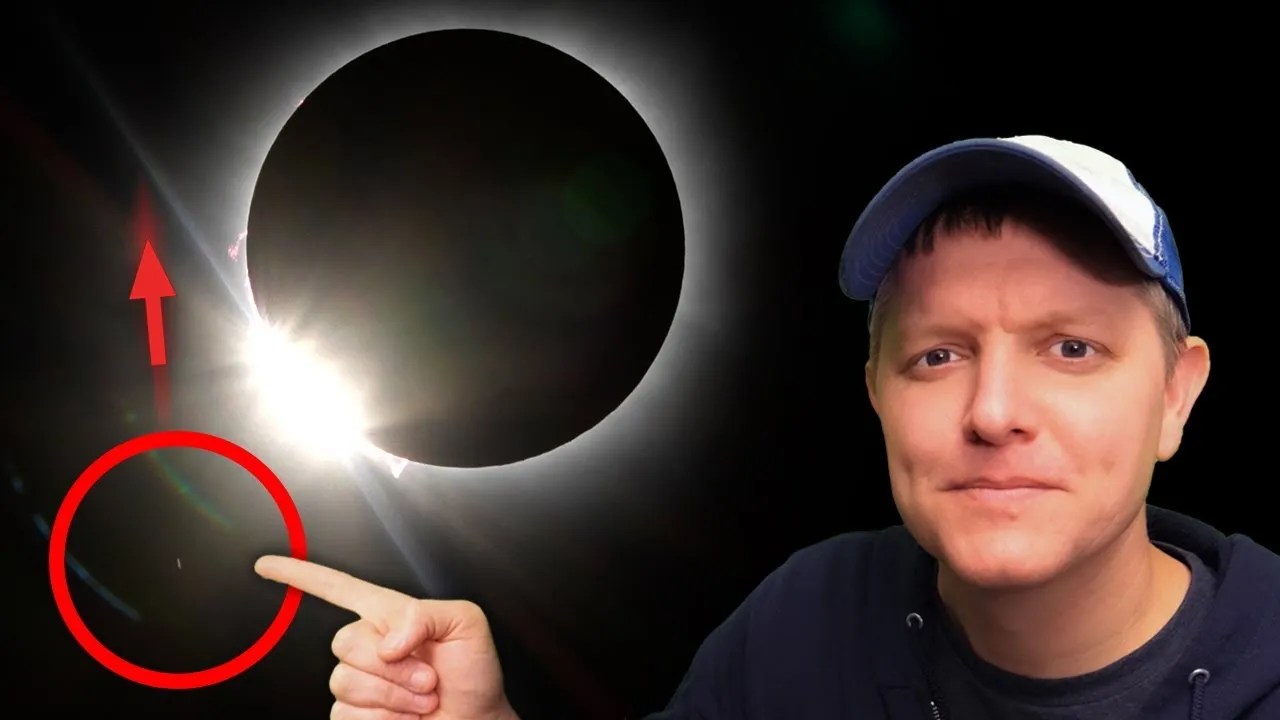
The Unexpected Discovery
During the analysis of footage captured during the eclipse, an intriguing anomaly was observed: an unidentified object seemingly flying across the sky near the reappearance of the sun. This discovery led to an investigation involving satellite expert Jonathan McDowell and fellow YouTuber Jeff Geerling. By comparing footage from different cameras and analyzing the object’s apparent speed and trajectory, the conclusion leaned towards it being a satellite, though its exact identity remained a mystery, posing a fun challenge for space enthusiasts and orbital mechanics experts.
Conclusion
Creating a composite solar eclipse image on a single piece of film is a technically demanding but incredibly rewarding endeavor. It requires careful planning, precise execution, and a deep appreciation for the art of analog photography.
Whether you succeed in capturing the perfect composite or uncover unexpected phenomena like the mysterious object, the experience of photographing a total solar eclipse is unforgettable. This technique, reminiscent of methods used decades ago, offers a unique way to document the celestial event and connect with photographic history.
Source: I Accidentally Photographed Something Unknown During the Eclipse – Smarter Every Day 298 (YouTube)